How to Organize a Pantry: A Simple System That Actually Stays Tidy
How to organize a pantry step by step, with zones, containers, labels and small-pantry ideas, plus the habits that stop it getting messy again.
We earn a commission if you buy through links on this page, at no extra cost to you. Learn more.
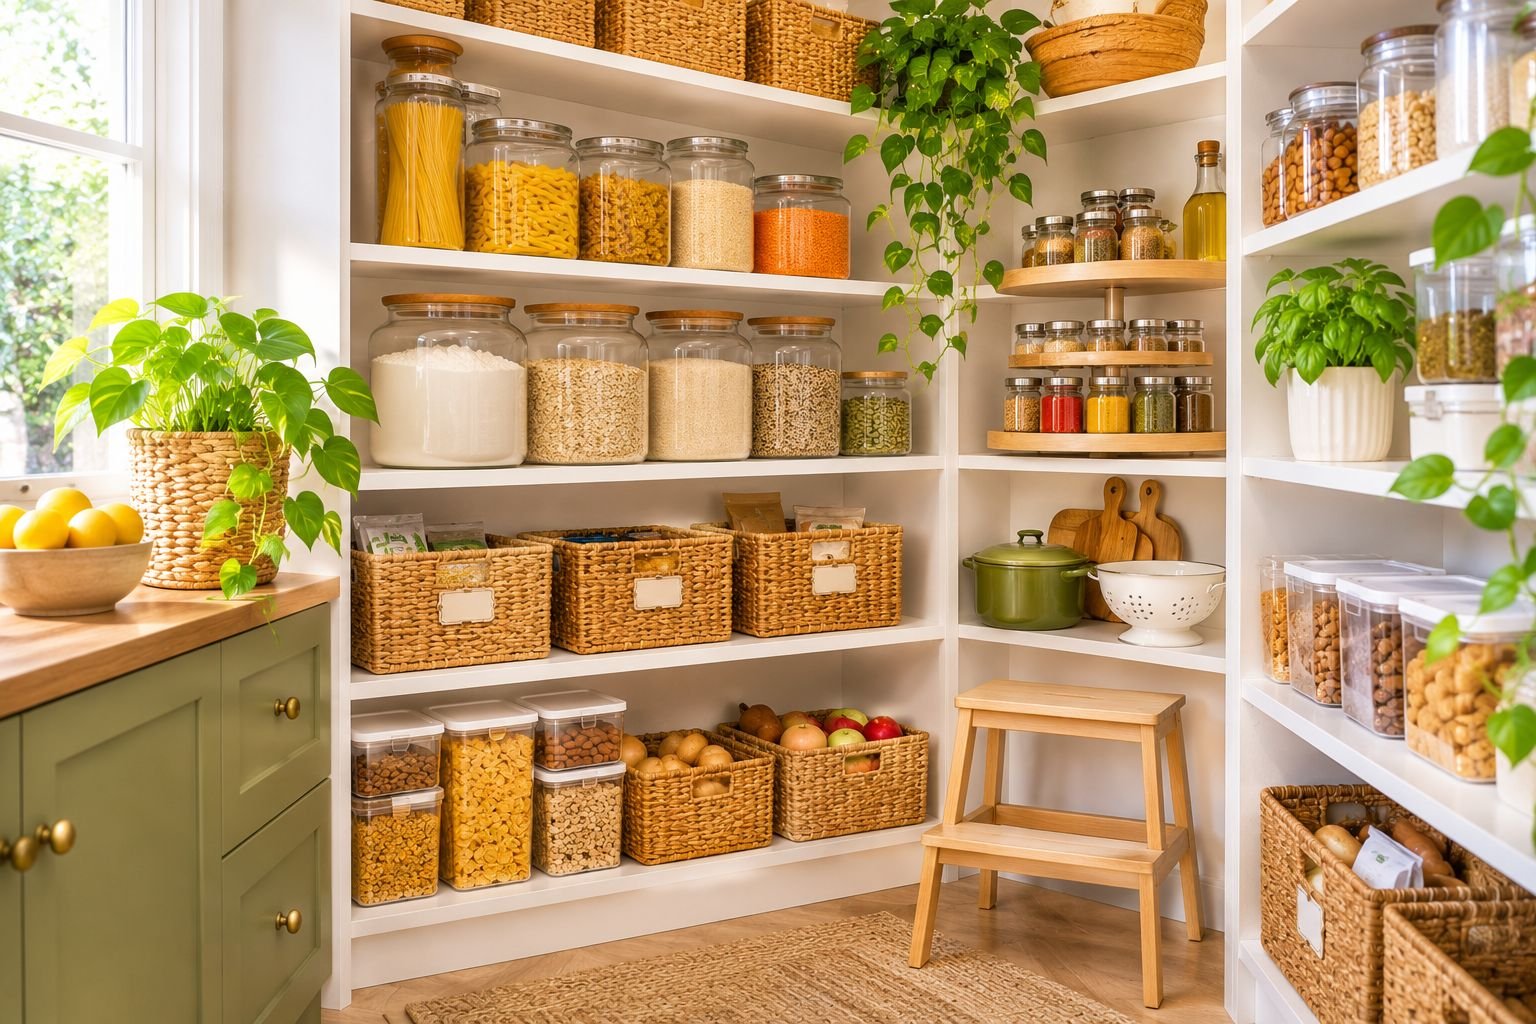
The short answer
To organize a pantry, empty it completely, throw out anything expired, and group what's left into categories like breakfast, baking, grains and pasta, tins, snacks, and sauces. Give each group a zone: everyday items at eye level, heavy items low, and backups up high. Decant dry goods like flour, rice and cereal into clear airtight containers, put small packets in bins, use turntables for deep corners, and label everything. Finally, keep it tidy with one rule: new stock goes behind old stock.
- Empty everything first. You can't organize around clutter.
- Organize by zones (breakfast, baking, snacks), not by package size.
- Eye level is prime space. Put what you use daily there, heavy items low and backups high.
- Clear airtight containers keep food fresh and show you what's running low.
- Labels and a "first in, first out" rule are what keep a pantry organized.
A messy pantry costs you money and time. You buy a third jar of cumin because you couldn’t find the first two, food expires at the back of the shelf, and cooking starts with a hunt.
The good news is that an organized pantry doesn’t need a walk-in cupboard or a hundred matching jars. It needs a simple system: clear out, group, give everything a home, and make it easy to put things back. Here’s how, step by step, for any size of pantry.
Before you start
- Set aside 1–3 hours, depending on size.
- Grab a bin bag, cleaning spray, a cloth, a tape measure and a marker.
- Don’t buy containers yet. Measure your shelves and see what you actually have first.
Step 1: Empty everything out
Take every item out and put it on the bench or table. It’s the only way to see what you have and the space you’re working with.
Step 2: Clean the shelves
Vacuum crumbs from the corners, wipe the shelves with a mild cleaner and let them dry. Check for signs of pantry moths, such as webbing in flour or tiny larvae in corners.
Step 3: Declutter
- Throw out anything expired, stale or bug-affected.
- Donate unopened food you won’t eat.
- Combine duplicates, like two open bags of rice.
Step 4: Group into categories
Sort what’s left into groups that match how you cook. For example:
| Zone | What goes in it |
|---|---|
| Breakfast | Cereal, oats, spreads, coffee and tea |
| Baking | Flour, sugar, baking soda, chocolate chips, sprinkles |
| Grains and pasta | Rice, pasta, noodles, quinoa |
| Tins and jars | Tomatoes, beans, tuna, soups |
| Sauces and oils | Oils, vinegars, soy sauce, condiments |
| Spices | Herbs, spices, stock cubes |
| Snacks | Chips, crackers, bars, lunchbox snacks |
| Backups | Unopened extras of everyday items |
Step 5: Give each zone a home
Use your shelves strategically:
- Eye level: what you use every day (breakfast, snacks, everyday staples).
- Lower shelves: heavy items (tins, bulk bags, drinks), plus kids’ snacks if you want them to help themselves.
- Top shelves: backups, party supplies and rarely used appliances.
- Door: spices, packets and wraps on an over-the-door rack.
Keep each zone together so everyone in the house knows where things live.
Step 6: Decant the right things into clear containers
Clear, airtight containers keep food fresh, keep bugs out, and show you at a glance when you’re running low. Square containers waste far less space than round ones.
Decant: flour, sugar, rice, pasta, cereal, oats, nuts, snacks. Don’t bother decanting: tins, jars, bottles and anything you use rarely.
| Feature | Best containersOXO Good Grips POP 5-Piece Airtight Container Set | Budget containersShazo Airtight Food Storage Containers (set of 6) | Best binsVtopmart Clear Organizer Bins with Handles (8-pack) |
|---|---|---|---|
| Best for | A good-looking, airtight set for flour, sugar, pasta, cereal and snacks | Decanting dry goods on a budget | Grouping snacks, packets and small items into zones |
| Price band | Premium | Budget | Budget |
| Pieces | 5 containers | 6 containers | 8 bins |
| Material | BPA-free plastic | BPA-free plastic | Clear BPA-free plastic |
| Seal | Push-button airtight | Locking lid | — |
| Use | — | — | Pantry or fridge |
| Where to buy | Check price | Check price | Check price |
Our pick: the OXO POP containers are the classic choice. One push of the button seals them airtight, and the square shape stacks neatly. On a budget, a set like Shazo’s does the same job for much less.
Step 7: Use bins, risers and turntables
- Clear bins with handles turn deep shelves into pull-out drawers, which is perfect for snack packets, sachets and baking bits.
- Turntables (lazy Susans) bring jars at the back of corners to the front.
- Shelf risers double up shelf space for tins and jars.
Step 8: Label everything
Labels are what make a system last, especially for everyone else in the house. Label shelves or bins by zone (“Breakfast”, “Baking”) and containers by contents. On decanted food, add the best-before date on a small label on the back or base.
Small pantry ideas
- Use the door with an over-the-door rack.
- Add shelf risers to use the wasted height above short items.
- Choose square, stackable containers over round jars.
- Use slim, deep bins so nothing gets lost at the back.
- Keep backups elsewhere, like a laundry cupboard or garage shelf.
- Hang a small basket under a shelf for wraps and bags.
How to keep your pantry organized
- First in, first out: new groceries go behind older ones.
- Unpack straight into zones, not onto the nearest gap.
- Keep a running shopping list on the door or your phone. Add items when a container gets low.
- Do a 5-minute weekly reset to put things back in their zones.
- Do a full clear-out every 3–6 months to wipe the shelves and check dates.
Storing leftovers too? See our guide to the best food storage containers.
Common questions
What is the best way to organize a pantry?
Empty it, sort and declutter, then group items into zones by how you use them (breakfast, baking, dinner staples, snacks). Store everyday items at eye level, decant dry goods into clear containers, use bins for small packets, and label every shelf or container. Keep it up with a quick tidy each time you unpack groceries.
How do I organize a small pantry?
Use the height and the door. Add shelf risers to double up on shelves, over-the-door racks for spices and packets, square stackable containers instead of round ones, and turntables in the corners. Keep only what you use. Store bulk backups somewhere else if space is tight.
Should I decant everything into containers?
No. Decant the things you use often and that come in awkward packets, like flour, sugar, rice, pasta, cereal, oats and snacks. Leave tins, jars and bottles in their original packaging. Decanting everything is expensive and time-consuming.
What should go on each pantry shelf?
Put everyday items like breakfast foods, snacks and cooking staples at eye level. Heavy items like tins, bulk bags, potatoes and drinks go on the lowest shelves. Backups, rarely used appliances and special-occasion items go on the top shelves.
How do I keep pantry food fresh longer?
Store dry goods in airtight containers, keep the pantry cool, dark and dry, and use older stock first. Write the expiry or best-before date on a small label on the container's base or back when you decant.
How do I stop pantry moths and bugs?
Keep dry goods in airtight containers, wipe up crumbs and spills, and check flour, grains and nuts for webbing before decanting. Freezing new flour or grains for a few days can kill any eggs. If you find moths, throw out affected food, vacuum the shelves and wipe them down.
How often should I clean out my pantry?
Do a quick tidy weekly (put things back in their zones) and a full clear-out every 3–6 months to wipe the shelves and check dates.
Sources
Keep reading
The Best Cordless Vacuum for Hardwood Floors (That Won't Scratch Them)
The best cordless vacuums for hardwood floors, why a soft roller head matters, wet-dry picks for sticky spills, and how to vacuum wood without scratches.
The Best Robot Vacuum for Pet Hair: Self-Emptying, Tangle-Free and Mess-Avoiding Picks
The best robot vacuums for pet hair, which features matter for dogs and cats, whether self-emptying is worth it, and how to avoid the pet-mess disaster.
How to Clean Hardwood Floors (Without Damaging the Finish)
How to clean hardwood floors the right way, daily, weekly and deep cleaning, what never to use, and how to fix dull, sticky or streaky timber floors.